Site Requirements for all UP3D Equipment Installations.
- Stuart Anderton

- Mar 31
- 4 min read
Updated: Apr 22
This article outlines the site requirements for installation of your UP3D milling system and associated equipment. Please review each section carefully and ensure all requirements are met prior to the installation date. Proper preparation will allow us to complete installation, calibration and training without delays, so you can start using your system as soon as possible.
Furnaces
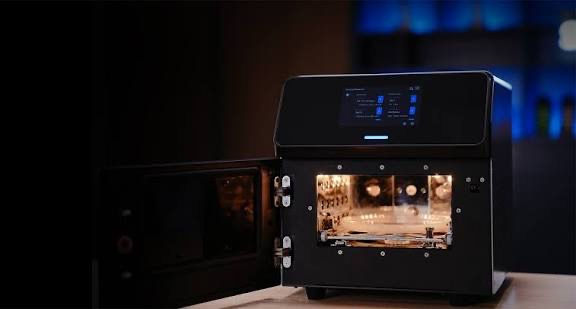
F30 - Porcelain Furnace
600mm counter top depth required
300mm clearance left/right of furnace required
No overhead cabinets
10 Amp outlet - 15 Amp preferred
No power board allowed
F20 - Sintering Furnace
600mm counter top depth required
300mm clearance left/right of furnace required
No overhead cabinets
15 Amp outlet required
No power board allowed
Fxx - Speed Sintering Furnace (not yet available)
600mm counter top depth required
300mm clearance left/right of furnace required
No overhead cabinets
15 Amp outlet required
No power board allowed
Milling Machines
P55D - Dry single disk milling machine
700-800mm counter top depth required
600mm machine width
400mm clearance left/right of mill required
Counter must be able to support 120kg without bowing
10 Amp outlet
1x ethernet connection to router/switch
Compressed air is not required (Air gun within reach is ideal for cleaning but not essential)
P53DC - Dry 12 disk changing milling machine
800-1000mm counter top depth required
1000mm machine width
400mm clearance left/right of mill required
Counter must be able to support 150kg without bowing
10 Amp outlet
1x ethernet connection to router/switch
1/4" PE tube connection to dry compressed air delivered at up to 100 L/min
Air gun within reach is ideal for cleaning but not essential
P42PLUS - wet block milling machine
600mm counter top depth required
600mm machine width
400mm clearance left/right of mill required
Counter must be able to support 80kg without bowing
10 Amp outlet
1x ethernet connection to router/switch
Compressed air is not required (Air gun within reach is ideal for cleaning but not essential)
ICORE 5X - Titanium milling machine
600x600mm floor space required
2200mm vertical space required
400mm clearance left/right of mill
3x 10 Amp outlets - 15 Amp preferred
No power board allowed
1x ethernet connection to router/switch
1/4" PE tube connection to dry compressed air delivered at up to 100 L/min
Air gun within reach is essential for cleaning
Bench Size
If your bench is not large enough, we will install, provision and calibrate the mill on the floor. Once you have the correct cabinetry in place, you can move the unit yourself. No recalibration or service visit is required.
Network Requirements
If you only have a single ethernet port available, you will need a network switch. Please arrange this with your IT provider before installation. We will bring a switch and spare cable on the day as a backup, however if it is left on site there is a $400 charge. It is better to have this sorted in advance. Compressor If compressed air is required, it must be provided by a suitable standalone compressor, similar to the unit available from Sydney Tools HERE. You can order directly and have it delivered to your clinic or lab ahead of the installation date. The compressor used for your dental chairs will not be suitable for milling machines, as it does not provide sufficient airflow or consistent line pressure.
15 Amp Power (Furnaces)
If the 15 amp outlets are not installed prior to delivery, we will still unpack and provision the furnaces. You can connect them once power is available, and we will guide you over the phone to load the required programs.
Pre-Installation Check
We will contact you 5 business days prior to installation to confirm all site requirements are met. This will include photographs of the requirements fulfilled. If anything is not ready, we will recommend delaying installation until all trades and requirements are complete. This ensures a smooth setup with minimal interruptions.
Installation Process
Day 1 – Installation & Setup
Our engineer and sales representative will arrive on site
All equipment will be unpacked and installed
Systems will be provisioned, tested and calibrated
Calibration targets and sample restorations will be milled
Your involvement on this day is minimal. We handle the full setup.
Day 2 – Training
Software and hardware training
CAM, manufacturing and post-processing workflows
Maintenance and daily operation
Do not plan to mill real cases on Day 1 or 2 or bring cases to run. We will release the system for clinical use only after training is complete and all design requirements for part milling is outlined. This is to ensure you are set up for consistent, unattended success from the start, not early failures. Clear communication, proper planning and having all site requirements in place ahead of time will ensure the smoothest possible installation. Our team will guide you through each step and do everything we can to make the process straightforward.
Our goal is simple: to get your UP3D milling system installed, running reliably and producing consistent results, with you fully confident to use it in your clinic or lab.